Last Updated on January 7, 2025 by Adil
Pixelating an image is a popular design technique often used to achieve a retro, abstract, or low-resolution effect. If you’re a Canva user and want to pixelate your images, the process can be seamlessly accomplished using a third-party app called Pixelify. This tutorial will guide you step-by-step through the process of How to Pixelate an Image in Canva using Pixelify, while also highlighting important tips to make your work easier and more professional.
What Is Pixelify?
Pixelify is a user-friendly app designed to pixelate images with just a few clicks. It integrates well with Canva and offers customizable settings to achieve the perfect pixelation effect. Whether you’re a graphic designer, content creator, or someone experimenting with visuals, Pixelify can help you add a unique touch to your projects.
Why Pixelate Images?
Pixelation can serve various purposes, such as:
- Creating Abstract Designs: Pixelated images add a modern, artsy vibe.
- Protecting Privacy: Blur sensitive parts of an image.
- Highlighting Retro Themes: Give your designs a nostalgic, 8-bit video game feel.
- Focusing Attention: Pixelation can draw the viewer’s eyes to specific areas of an image by reducing detail elsewhere.
Step-by-Step Guide to Pixelate an Image in Canva
Follow these steps to pixelate an image in Canva using Pixelify:
Step 1: Prepare Your Canva Account
- Log in to Canva: Start by logging into your Canva account. If you don’t already have one, sign up for a free account at Canva.
- Open a Design Project: Create a new project or open an existing design where you want to include the pixelated image.
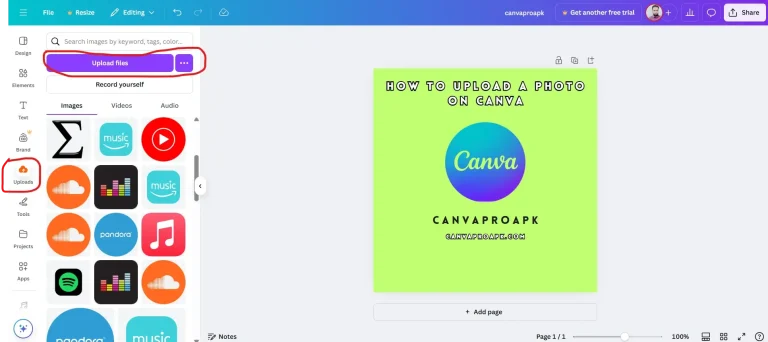
- Upload the Image: If you haven’t already uploaded your image, click on the Uploads section on the left-hand toolbar, then drag and drop your image or click the Upload Files button.
Step 2: Access the Pixelify App
- Install Pixelify: If you don’t already have the app, download and install Pixelify from your preferred app store.
- Launch Pixelify: Open the Pixelify app and ensure it’s ready for use. The interface is simple and easy to navigate, even for beginners.
Step 3: Import the Image to Pixelify
- Export the Image from Canva: Download your image from Canva as a PNG or JPG file.
- To do this, click on the Share button in the top-right corner of Canva, then select Download and choose the desired file format.
- Upload to Pixelify: Open Pixelify and click on the Upload button. Locate the downloaded image on your device and upload it to Pixelify.
Step 4: Apply Pixelation in Pixelify
- Choose Pixelation Settings:
- Adjust the Pixel Size slider to control the level of pixelation. Larger pixels create a more pronounced effect, while smaller pixels offer subtle blurring.
- Some versions of Pixelify also allow you to select specific areas of the image to pixelate. Use this option if you want to focus the effect on certain parts of your image.
- Preview the Effect: Check the preview to ensure the pixelation meets your expectations. You can tweak the settings further if needed.
Step 5: Export the Pixelated Image
- Download the Pixelated Image: Once satisfied, click on the Download button in Pixelify to save the pixelated image to your device.
- Re-Upload to Canva: Return to your Canva project, go to the Uploads section, and re-upload the pixelated image.
Step 6: Incorporate the Pixelated Image in Canva
- Place the Image: Drag the pixelated image onto your Canva design. Resize, crop, or rotate it as needed.
- Combine with Other Elements: Enhance your design by adding text, shapes, or other graphics. Canva’s extensive library of elements can help you create a cohesive and visually appealing layout.
- Finalize Your Design: Review your design to ensure all elements are well-aligned and balanced.
Tips for Better Results
- Experiment with Pixel Sizes: The right pixel size depends on the purpose of your design. Test different levels to find the perfect look.
- Blend with Backgrounds: If the pixelated image contrasts too sharply with your design, use Canva’s transparency tool to soften the effect.
- Try Layering: Overlay multiple pixelated images or combine pixelated and non-pixelated visuals for a dynamic composition.
- Save Versions: Save multiple versions of your design as you work, so you can revert to a previous stage if needed.
Common Mistakes to Avoid
- Over-Pixelation: Too much pixelation can obscure the subject of your image. Ensure the main elements remain recognizable.
- Poor Resolution: Always start with a high-resolution image to maintain quality after pixelation.
- Ignoring Context: Pixelation might not suit every project. Consider your audience and purpose before applying the effect.
Conclusion
Pixelating an image in Canva using Pixelify is a straightforward process that opens up new creative possibilities. By following this detailed tutorial, you’ll be able to seamlessly integrate pixelated images into your designs, whether for artistic flair, privacy, or thematic effect.
Remember to highlight important areas, experiment with different pixel sizes, and combine effects creatively for the best results. With practice, you’ll master this technique and elevate your Canva projects to the next level.