Last Updated on January 13, 2025 by Adil
Adding music or audio to your Canva video can elevate its impact, making it more engaging and professional. Canva provides an intuitive platform for creating visually stunning videos, and incorporating audio is a seamless process. In this guide, we’ll walk you through how to add audio to a Canva video, ensuring your projects stand out.
Introduction
Adding audio to your Canva videos is a simple yet powerful way to enhance your content. Whether you want to include background music, narration, or sound effects, Canva makes it easy to bring your video to life. In this comprehensive guide, we will cover everything you need to know about how to add music on Canva, from selecting the right audio to editing and exporting your final project. By following these steps, you’ll be able to create professional-grade videos with ease.
Step 1 – Add a Canva Video Template
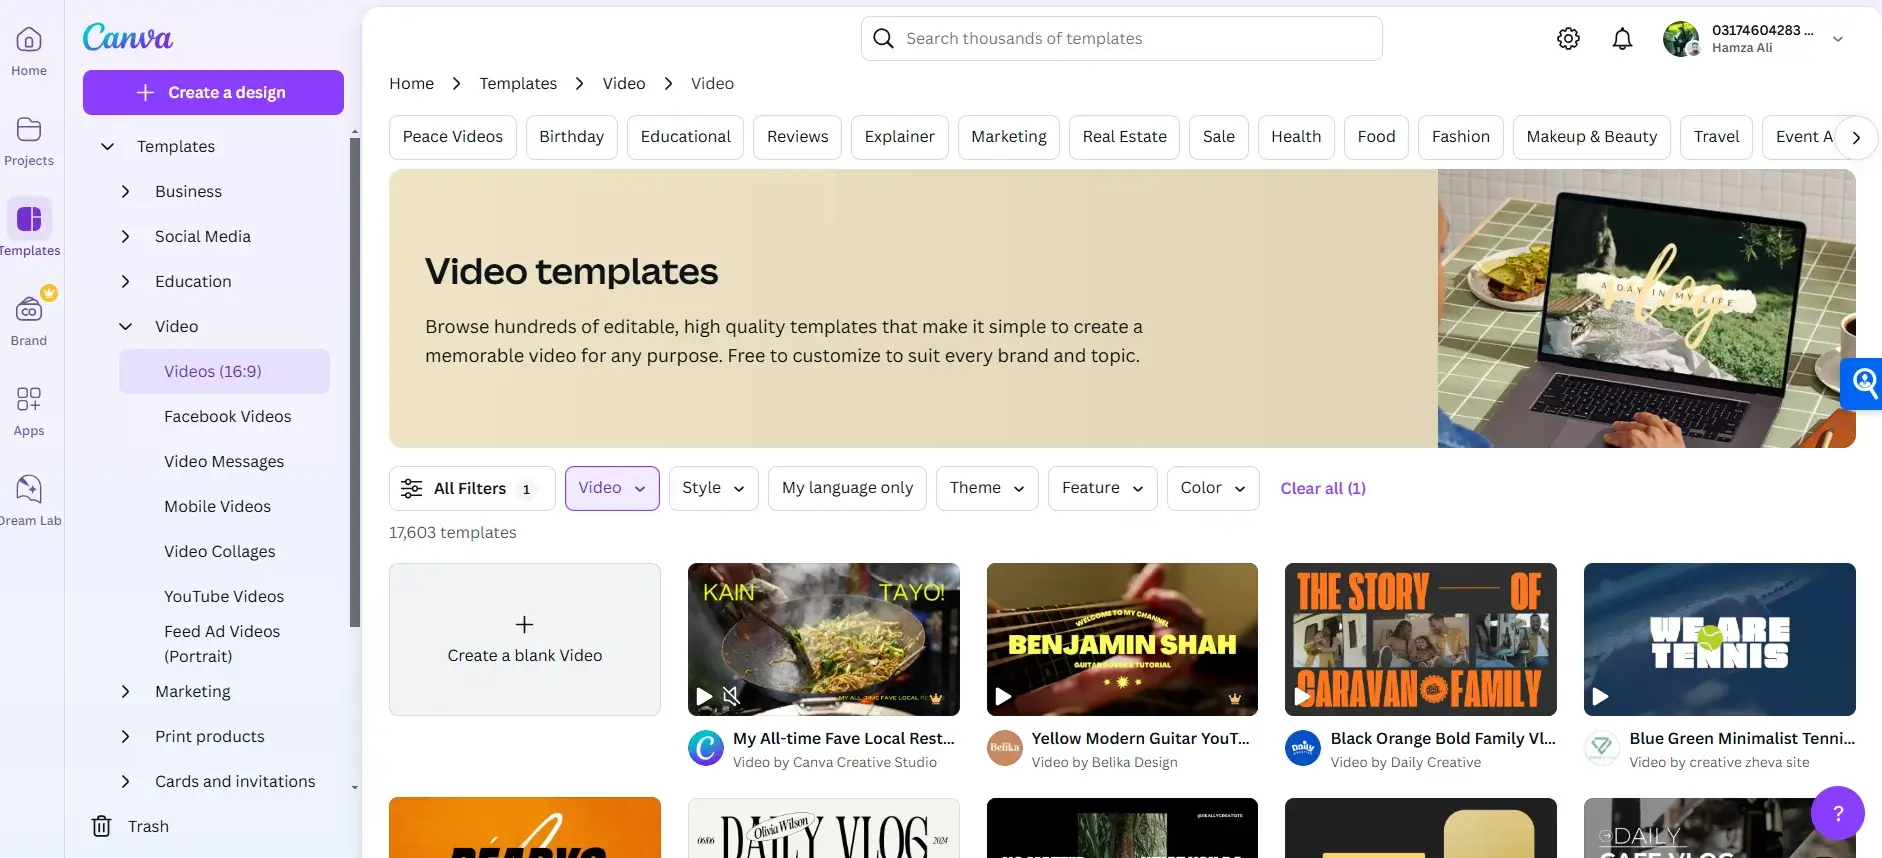
To get started, you need a video project. Canva offers a wide range of templates for different purposes, making it easy to find one that fits your needs.
- Log in to Canva
- Open Canva in your browser or app and log in to your account.
- Search for Video Templates
- In the search bar, type “Video Templates” and browse through the options. Canva provides templates for various themes like marketing, education, and social media.
- Select a Template
- Choose a template that suits your project. Click on it to open the editor.
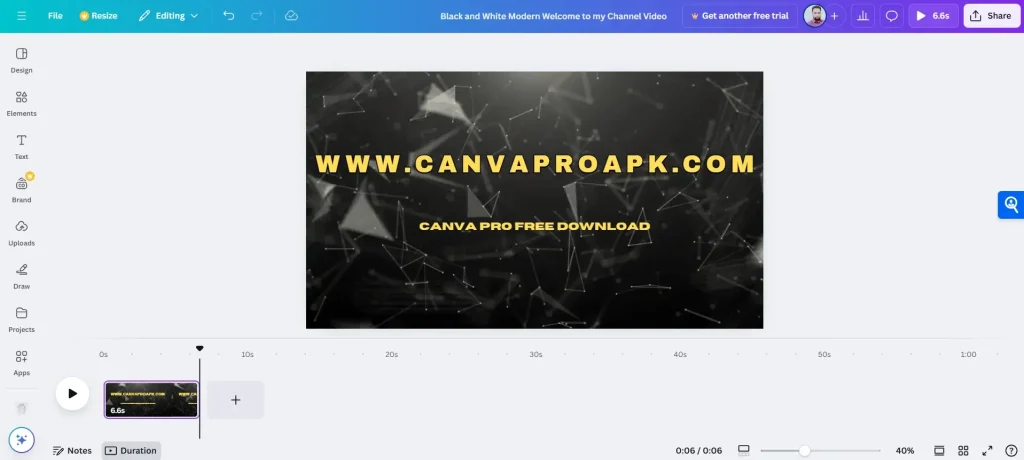
- Customize the Video
- Replace placeholder text, images, or elements with your own content. Adjust colors, fonts, and animations as needed.
Step 2 – Add Audio to the Canva Video
Now that your video template is ready, it’s time to add audio to your project.

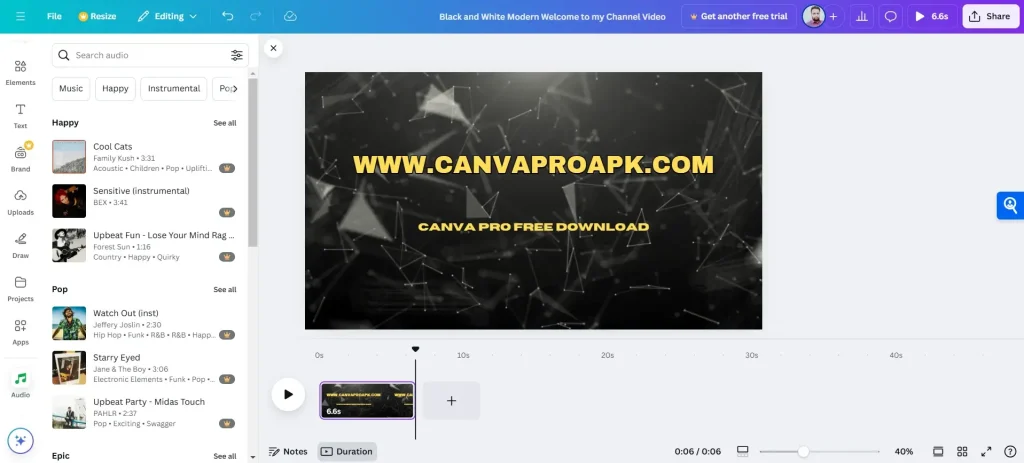
- Access the Audio Tab
- On the left sidebar, click on the Audio tab. Canva’s library includes a variety of free and premium tracks.
- Choose an Audio Track
- Browse the available tracks and preview them by clicking on the play button.
- Use the search bar to find specific genres or moods.
- Drag and Drop the Audio
- Select your desired audio and drag it onto the video timeline. The audio will automatically align with the video’s duration.
- Upload Custom Audio (Optional)
- Click on the Uploads tab and select Upload Files to import your own audio. Drag it onto the timeline to include it in your project.
Step 3 – Edit the Audio Settings in Canva
Fine-tuning your audio is essential for creating a polished video. Canva provides tools to adjust audio selection, effects, and volume.
Adjust the Audio Selection
- If you want to change the track, simply delete the existing one and drag a new track onto the timeline.
- Use the search filters to find tracks by genre, mood, or duration.
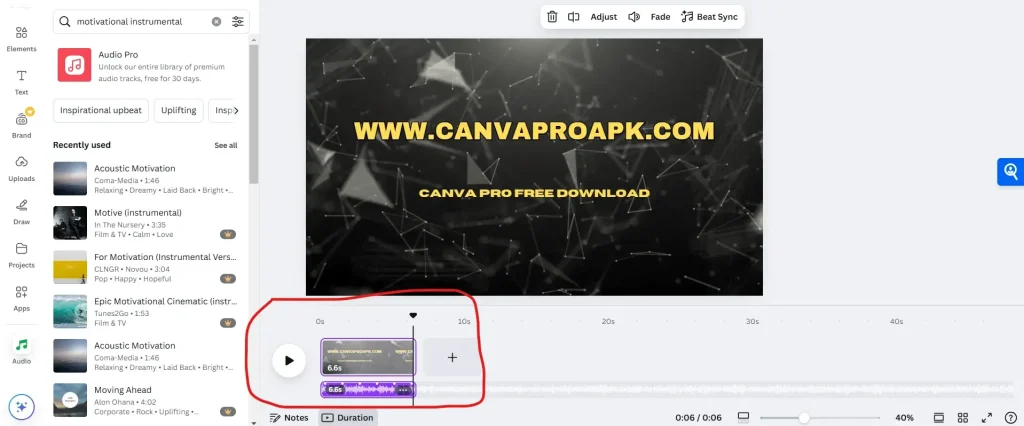
Edit the Audio Effects
- Click on the audio track in the timeline to access settings.
- Apply fade-in and fade-out effects for smoother transitions.
- Trim the audio by dragging the edges of the track on the timeline.
Change the Volume, Duplicate or Delete an Audio Track
- Adjust the volume slider to increase or decrease the sound level.
- Duplicate a track by right-clicking and selecting “Duplicate.”
- Delete a track by selecting it and pressing the delete key.
Step 4 – Add a Voice Recording
Narrations or voiceovers can add a personal touch to your video. Canva allows you to record audio directly within the platform.
- Enable Microphone Access
- Ensure Canva has permission to use your microphone.
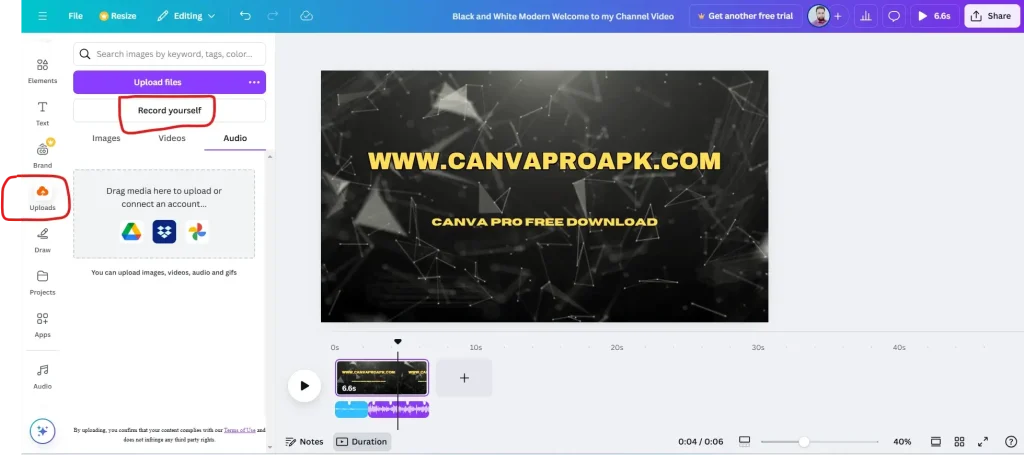
- Record Your Voice
- In the Uploads tab, select Record Yourself and follow the prompts to start recording.
- Edit Your Recording
- Once recorded, drag the audio file onto the timeline.
- Trim, adjust volume, and add effects as needed.
Step 5 – Split Audio Between Video Frames in Canva
If your video contains multiple frames, you may want to align audio segments with specific scenes.
- Split the Audio
- Select the audio track and move the play head to the desired split point.
- Right-click and choose “Split Audio.”
- Align Audio with Frames
- Drag each split segment to match the corresponding video frame.
- Fine-Tune Transitions
- Apply fade effects between segments for smoother transitions.
Step 6 – Export Your File
Once your video and audio are perfectly aligned, it’s time to export the final product.
- Preview the Video
- Click the Play button to review your project. Ensure that audio and visuals are synchronized.
- Download the Video
- Click Share > Download and select MP4 Video as the format.
- Choose your desired resolution and click Download.
Conclusion
Adding audio to your Canva video is a simple process that can significantly enhance your content. Whether you’re creating videos for personal or professional use, following this guide on how to add audio to a Canva video will help you achieve impressive results. With tools for audio adjustments, effects, and voice recording, Canva makes it easy to create videos that captivate your audience.